目錄
用 Docker 執行 Nginx:靜態網站與反向代理
這一節分成兩部分:先用 Nginx 提供靜態網站,再把 Nginx 當成反向代理,放在其他應用程式容器前面。最後介紹用 Caddy 自動取得 HTTPS 憑證。
最快的靜態網站
準備一個資料夾 nginx-site,網站檔案放在 public/:
nginx-site/
└── public/
    ├── index.html
    ├── style.css
└── app.jspublic/index.html:
<!doctype html>
<html lang="en">
<head>
  <meta charset="utf-8">
  <meta name="viewport" content="width=device-width, initial-scale=1">
  <title>My Static Site</title>
  <link rel="stylesheet" href="/style.css">
</head>
<body>
  <main>
    <h1>My Static Site</h1>
    <p>Served by Nginx in a Docker container.</p>
    <p id="path"></p>
  </main>
  <script src="/app.js"></script>
</body>
</html>
public/app.js 只有一行,把目前的網址路徑顯示在頁面上(後面測試 SPA 時會用到):
document.getElementById("path").textContent = "Current path: " + location.pathname;style.css 內容隨意。把 public/ 掛載到官方映像檔的網站根目錄 /usr/share/nginx/html:
$ docker run -d --name site -p 8080:80 -v "$(pwd)/public:/usr/share/nginx/html:ro" nginx:1.30-alpine
806fb20a7c3ba980710bf43520c118d724346248d387f8743f8ba26e5e182345

$ curl -s http://localhost:8080/ | head -n 6
<!doctype html>
<html lang="en">
<head>
  <meta charset="utf-8">
  <meta name="viewport" content="width=device-width, initial-scale=1">
  <title>My Static Site</title>

$ curl -s -o /dev/null -w "%{http_code}\n" http://localhost:8080/dashboard/settings
404
對應 Windows 的寫法(點選分頁切換):
docker run -d --name site -p 8080:80 -v "$(pwd)/public:/usr/share/nginx/html:ro" nginx:1.30-alpinedocker run -d --name site -p 8080:80 -v "${PWD}/public:/usr/share/nginx/html:ro" nginx:1.30-alpinedocker run -d --name site -p 8080:80 -v "%cd%/public:/usr/share/nginx/html:ro" nginx:1.30-alpine:ro 表示唯讀,Nginx 只需要讀取檔案。打開 http://localhost:8080:
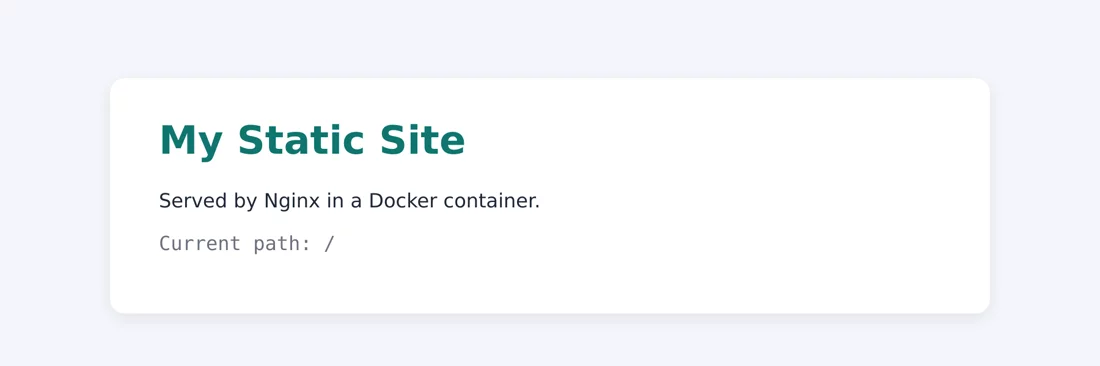
最後一個指令請求一個不存在的路徑 /dashboard/settings,得到 404。對一般網站來說這是正確的;但如果是 React、Vue 等單頁應用(SPA),網址路徑由前端處理,伺服器應該回傳 index.html。這需要自訂設定檔。
自訂設定檔
官方映像檔會載入 /etc/nginx/conf.d/ 中所有的 .conf 檔,預設只有一個 default.conf。最簡單的做法是用自己的檔案取代它。
第一版 default.conf:
server {
    listen 80;
    server_name _;
    root /usr/share/nginx/html;
    index index.html;

    # 單頁應用(SPA):找不到檔案時回傳 index.html
    location / {
        try_files $uri $uri/ /index.html;
    }

    # 靜態資源長時間快取
    location ~* \.(js|css|png|jpg|svg|woff2)$ {
        expires 30d;
        add_header Cache-Control "public, immutable";
    }

    gzip on;
    gzip_types text/css application/javascript application/json image/svg+xml;
}| 設定 | 作用 |
|---|---|
try_files $uri $uri/ /index.html | 依序找檔案、資料夾,都找不到就回傳 /index.html |
location ~* \.(js|css|...)$ | ~* 表示不分大小寫的正規表示式,比對靜態資源 |
gzip on + gzip_types | 壓縮文字類型的回應。HTML 預設就會壓縮,其他類型要列在 gzip_types |
把設定檔也掛載進去:
$ docker run -d --name site -p 8080:80 -v "$(pwd)/default.conf:/etc/nginx/conf.d/default.conf:ro" -v "$(pwd)/public:/usr/share/nginx/html:ro" nginx:1.30-alpine
89c2d3163e3db3bb4192bac6dfd48732c5f72d2d9d4584b9d3e1a32416c01f2a

$ curl -s -o /dev/null -w "%{http_code}\n" http://localhost:8080/dashboard/settings
200

$ curl -sI -H "Accept-Encoding: gzip" http://localhost:8080/style.css
HTTP/1.1 200 OK
Server: nginx/1.30.5
Date: Tue, 13 Oct 2026 00:40:31 GMT
Content-Type: text/css
Last-Modified: Tue, 13 Oct 2026 00:38:42 GMT
Connection: keep-alive
ETag: W/"6acd7d92-154"
Expires: Thu, 12 Nov 2026 00:40:31 GMT
Cache-Control: max-age=2592000
Cache-Control: public, immutable
Content-Encoding: gzip
對應 Windows 的寫法(點選分頁切換):
docker run -d --name site -p 8080:80 -v "$(pwd)/default.conf:/etc/nginx/conf.d/default.conf:ro" -v "$(pwd)/public:/usr/share/nginx/html:ro" nginx:1.30-alpinedocker run -d --name site -p 8080:80 -v "${PWD}/default.conf:/etc/nginx/conf.d/default.conf:ro" -v "${PWD}/public:/usr/share/nginx/html:ro" nginx:1.30-alpinedocker run -d --name site -p 8080:80 -v "%cd%/default.conf:/etc/nginx/conf.d/default.conf:ro" -v "%cd%/public:/usr/share/nginx/html:ro" nginx:1.30-alpine/dashboard/settings現在回傳200,try_files生效。Content-Encoding: gzip表示 CSS 有被壓縮。- 但
Cache-Control出現了兩次:expires 30d會自動產生Cache-Control: max-age=2592000,add_header又加了一個。瀏覽器通常能處理,但這不是我們想要的結果。
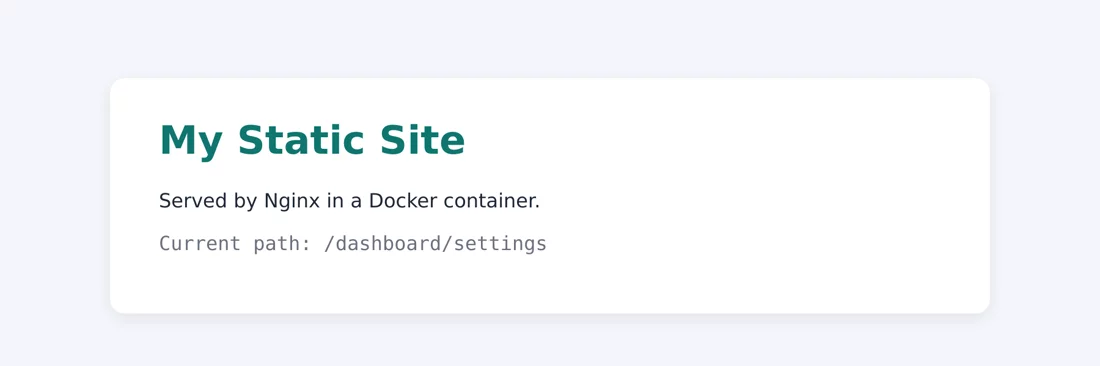
在瀏覽器打開 http://localhost:8080/dashboard/settings,顯示的是 index.html,而 JavaScript 讀到的路徑是 /dashboard/settings,前端路由就能依此顯示對應的頁面:
修正快取設定:拿掉 expires,只用一個 add_header 寫完整:
    location ~* \.(js|css|png|jpg|svg|woff2)$ {
        add_header Cache-Control "public, max-age=2592000, immutable";
    }
$ docker run -d --name site -p 8080:80 -v "$(pwd)/default.conf:/etc/nginx/conf.d/default.conf:ro" -v "$(pwd)/public:/usr/share/nginx/html:ro" nginx:1.30-alpine
868d331a579d208e646ee1be3a3d2a906720578a39418db2c4bd50febb892fd7
$ curl -sI -H "Accept-Encoding: gzip" http://localhost:8080/style.css | grep -E "Cache-Control|Content-Encoding"
Cache-Control: public, max-age=2592000, immutable
Content-Encoding: gzip對應 Windows 的寫法(點選分頁切換):
docker run -d --name site -p 8080:80 -v "$(pwd)/default.conf:/etc/nginx/conf.d/default.conf:ro" -v "$(pwd)/public:/usr/share/nginx/html:ro" nginx:1.30-alpinedocker run -d --name site -p 8080:80 -v "${PWD}/default.conf:/etc/nginx/conf.d/default.conf:ro" -v "${PWD}/public:/usr/share/nginx/html:ro" nginx:1.30-alpinedocker run -d --name site -p 8080:80 -v "%cd%/default.conf:/etc/nginx/conf.d/default.conf:ro" -v "%cd%/public:/usr/share/nginx/html:ro" nginx:1.30-alpine2592000 秒就是 30 天。immutable 告訴瀏覽器在期限內不用再確認檔案是否更新,所以只適合檔名含版本雜湊的檔案(例如 app.3f9a1c.js,前端建置工具通常會自動產生)。
檢查語法並重新載入
修改設定後,先用 nginx -t 檢查語法,通過再用 nginx -s reload 重新載入,不必重啟容器,進行中的連線也不會中斷:
$ docker exec site nginx -t
nginx: the configuration file /etc/nginx/nginx.conf syntax is ok
nginx: configuration file /etc/nginx/nginx.conf test is successful

$ docker exec site nginx -s reload
2026/10/13 00:40:34 [notice] 27#27: signal process started

$ docker logs site 2>&1 | tail -n 4
2026/10/13 00:40:34 [notice] 1#1: reconfiguring
2026/10/13 00:40:34 [notice] 1#1: using the "epoll" event method
2026/10/13 00:40:34 [notice] 1#1: start worker processes
2026/10/13 00:40:34 [notice] 1#1: start worker process 32
日誌中的 reconfiguring、start worker process 表示 Nginx 已經用新設定啟動新的 worker。
語法有錯時,nginx -t 會指出錯在哪裡。例如把 listen 80; 的分號刪掉:
$ sed 's/listen 80;/listen 80/' default.conf > broken.conf

$ docker run --rm -v "$(pwd)/broken.conf:/etc/nginx/conf.d/default.conf:ro" nginx:1.30-alpine nginx -t
/docker-entrypoint.sh: /docker-entrypoint.d/ is not empty, will attempt to perform configuration
/docker-entrypoint.sh: Looking for shell scripts in /docker-entrypoint.d/
/docker-entrypoint.sh: Launching /docker-entrypoint.d/10-listen-on-ipv6-by-default.sh
10-listen-on-ipv6-by-default.sh: info: can not modify /etc/nginx/conf.d/default.conf (read-only file system?)
/docker-entrypoint.sh: Sourcing /docker-entrypoint.d/15-local-resolvers.envsh
/docker-entrypoint.sh: Launching /docker-entrypoint.d/20-envsubst-on-templates.sh
/docker-entrypoint.sh: Launching /docker-entrypoint.d/30-tune-worker-processes.sh
/docker-entrypoint.sh: Configuration complete; ready for start up
2026/10/13 00:40:35 [emerg] 1#1: invalid parameter "server_name" in /etc/nginx/conf.d/default.conf:3
nginx: [emerg] invalid parameter "server_name" in /etc/nginx/conf.d/default.conf:3
nginx: configuration file /etc/nginx/nginx.conf test failed
對應 Windows 的寫法(點選分頁切換):
docker run --rm -v "$(pwd)/broken.conf:/etc/nginx/conf.d/default.conf:ro" nginx:1.30-alpine nginx -tdocker run --rm -v "${PWD}/broken.conf:/etc/nginx/conf.d/default.conf:ro" nginx:1.30-alpine nginx -tdocker run --rm -v "%cd%/broken.conf:/etc/nginx/conf.d/default.conf:ro" nginx:1.30-alpine nginx -t錯誤訊息說的是第 3 行的 server_name,但真正的問題在第 2 行少了分號:Nginx 把下一行的 server_name 也當成 listen 的參數。看到難以理解的錯誤時,記得檢查前一行。
前面幾行 /docker-entrypoint.sh: 開頭的訊息是官方映像檔的啟動腳本,can not modify ... (read-only file system?) 是因為我們用 :ro 唯讀掛載設定檔,腳本無法自動加上 IPv6 設定,可以忽略。
只用
docker run ... nginx -t就能檢查設定檔,不需要真的啟動網站。在 CI 中可以用這個方法先檢查設定再部署。
用環境變數產生設定
官方映像檔支援範本:把檔案放在 /etc/nginx/templates/ 下、副檔名為 .conf.template,啟動時會用環境變數替換其中的 ${變數},輸出到 /etc/nginx/conf.d/。
templates/default.conf.template:
server {
    listen 80;
    server_name ${SERVER_NAME};
    root /usr/share/nginx/html;

    location / {
        add_header X-Environment ${APP_ENV};
        try_files $uri $uri/ /index.html;
    }
}
$ docker run -d --name tpl -p 8080:80 -e SERVER_NAME=example.com -e APP_ENV=staging -v "$(pwd)/templates:/etc/nginx/templates:ro" -v "$(pwd)/public:/usr/share/nginx/html:ro" nginx:1.30-alpine
77b6991d1d85b713cc741c86504d61e6a8dc867997e80219ec77b3f3c3be3165
$ docker logs tpl 2>&1 | grep -i template
/docker-entrypoint.sh: Launching /docker-entrypoint.d/20-envsubst-on-templates.sh
20-envsubst-on-templates.sh: Running envsubst on /etc/nginx/templates/default.conf.template to /etc/nginx/conf.d/default.conf
$ docker exec tpl cat /etc/nginx/conf.d/default.conf
server {
listen 80;
server_name example.com;
root /usr/share/nginx/html;
location / {
add_header X-Environment staging;
try_files $uri $uri/ /index.html;
}
}
$ curl -sI http://localhost:8080/ | grep X-Environment
X-Environment: staging對應 Windows 的寫法(點選分頁切換):
docker run -d --name tpl -p 8080:80 -e SERVER_NAME=example.com -e APP_ENV=staging -v "$(pwd)/templates:/etc/nginx/templates:ro" -v "$(pwd)/public:/usr/share/nginx/html:ro" nginx:1.30-alpinedocker run -d --name tpl -p 8080:80 -e SERVER_NAME=example.com -e APP_ENV=staging -v "${PWD}/templates:/etc/nginx/templates:ro" -v "${PWD}/public:/usr/share/nginx/html:ro" nginx:1.30-alpinedocker run -d --name tpl -p 8080:80 -e SERVER_NAME=example.com -e APP_ENV=staging -v "%cd%/templates:/etc/nginx/templates:ro" -v "%cd%/public:/usr/share/nginx/html:ro" nginx:1.30-alpine${SERVER_NAME}、${APP_ENV} 被換成了環境變數的值,但 $uri 這類 Nginx 自己的變數沒有被動到:啟動腳本只替換已經定義的環境變數。同一個映像檔就能用不同的環境變數部署到測試和正式環境。
打包成映像檔
掛載適合開發;部署時把設定和網站檔案一起打包成映像檔。Dockerfile:
FROM nginx:1.30-alpine
COPY default.conf /etc/nginx/conf.d/default.conf
COPY public/ /usr/share/nginx/html/
$ docker build -t my-site .
[+] Building 2.3s (8/8) FINISHED docker:default
=> [internal] load build definition from Dockerfile 0.0s
=> => transferring dockerfile: 145B 0.0s
=> [internal] load metadata for docker.io/library/nginx:1.30-alpine 0.0s
=> [internal] load .dockerignore 0.0s
=> => transferring context: 2B 0.0s
=> [1/3] FROM docker.io/library/nginx:1.30-alpine@sha256:0985e772fb9f729e6fa0980da05fca5d9c468e870eed43071545afa9d2e27d94 1.9s
=> => resolve docker.io/library/nginx:1.30-alpine@sha256:0985e772fb9f729e6fa0980da05fca5d9c468e870eed43071545afa9d2e27d94 0.1s
=> => extracting sha256:e3320d02d5786716dcc40d9f6267baec5d3d2c46945082958050c3ac5ea23751 0.3s
=> => extracting sha256:3d85d110b167fae23d8eb3a7060cd079682b682b04d295fc7bbdf454c9e722c8 0.0s
=> => extracting sha256:22e5a8a110ec69c6af30325ccfe8bb0bfb94e5783117808061bae5115e1e3dcb 0.0s
=> => extracting sha256:6b4dfb2e8f8a72d7ae1380b667f50faccdc19147869b2afa09aeddfdea59ce64 0.0s
=> => extracting sha256:703c5424632fab32aa3327bebe6e5202ac53a93740062efb830f8188e580b9db 0.0s
=> => extracting sha256:b335b7ac3a400afa780d0d89e0b778ee19dc3e3df95bed4b274a763af2264fd7 0.0s
=> => extracting sha256:b27cf3f7c39dd0da0aa52a285f0c0cce938ac61472babfea353b1daa83586c49 1.4s
=> [internal] load build context 0.1s
=> => transferring context: 1.51kB 0.0s
=> [2/3] COPY default.conf /etc/nginx/conf.d/default.conf 0.1s
=> [3/3] COPY public/ /usr/share/nginx/html/ 0.0s
=> exporting to image 0.1s
=> => exporting layers 0.0s
=> => exporting manifest sha256:8bac0b1cbdfd6612d9eb656089bb18a18c4dba64cb8557aec5d427164a205865 0.0s
=> => exporting config sha256:5b6710aa0888ae70f084ad7911539cb362f4f919de995cf997898d37a9968baf 0.0s
=> => exporting attestation manifest sha256:9be9e0e07eacaece4ad72b53c87a2a7f84b4fa99af726bf98a33229fbbf9e4eb 0.0s
=> => exporting manifest list sha256:af4d78aa254eab0a55dd440f1e220ed73d0a5141343d9ae0fe19890e8471cd04 0.0s
=> => naming to docker.io/library/my-site:latest 0.0s
=> => unpacking to docker.io/library/my-site:latest 0.0s
$ docker run -d --name site -p 8080:80 my-site
d614148de5a6c2243074f865a0c03266a8e81ba069733546412d4abe9ad64fa0
$ curl -s http://localhost:8080/ | grep "<h1>"
<h1>My Static Site</h1>
$ docker images my-site
IMAGE ID DISK USAGE CONTENT SIZE EXTRA
my-site:latest af4d78aa254e 92.8MB 26.1MB U映像檔只比 nginx:1.30-alpine(93.7 MB)多一點點。需要先建置的前端專案(React、Vue 等),請參考 多階段建置:第一階段用 Node.js 執行 npm run build,第二階段把輸出的資料夾複製到 Nginx 映像檔。
反向代理:一個入口,多個後端
常見架構是只有 Nginx 對外開放連接埠,後端的應用程式容器都不開放:
使用者 ──▶ nginx:80 ──┬──▶ app:3000   (/      → Express)
└──▶ api:8000 (/api/ → FastAPI)這裡直接使用前兩節做好的專案當後端:Node.js 應用 的 Express,以及 Python 應用 的 FastAPI。
proxy-demo/
├── compose.yaml
├── nginx.conf
├── app/      ← Node.js 那一節的 Express 專案
└── api/ ← Python 那一節的 FastAPI 專案nginx.conf:
server {
    listen 80;

    location / {
        proxy_pass http://app:3000;
        proxy_set_header Host $host;
        proxy_set_header X-Real-IP $remote_addr;
        proxy_set_header X-Forwarded-For $proxy_add_x_forwarded_for;
        proxy_set_header X-Forwarded-Proto $scheme;
    }

    location /api/ {
        proxy_pass http://api:8000/;
        proxy_set_header Host $host;
        proxy_set_header X-Real-IP $remote_addr;
        proxy_set_header X-Forwarded-For $proxy_add_x_forwarded_for;
        proxy_set_header X-Forwarded-Proto $scheme;
    }

    client_max_body_size 20m;
}| 設定 | 作用 |
|---|---|
proxy_pass http://app:3000 | 轉給 Compose 服務 app 的 3000 埠(容器內的連接埠) |
Host | 保留使用者請求的網域,否則後端看到的是 app:3000 |
X-Real-IP、X-Forwarded-For | 傳遞使用者的真實 IP,否則後端看到的都是 Nginx 容器的 IP |
X-Forwarded-Proto | 告訴後端原始請求是 http 還是 https |
client_max_body_size 20m | 允許上傳的大小,預設只有 1 MB |
compose.yaml:
services:
  nginx:
    image: nginx:1.30-alpine
    ports:
      - "8080:80"
    volumes:
      - ./nginx.conf:/etc/nginx/conf.d/default.conf:ro
    depends_on:
      - app
      - api
    restart: unless-stopped

  app:
    build: ./app
    restart: unless-stopped

  api:
    build: ./api
    restart: unless-stopped
只有 nginx 有 ports。啟動:
$ docker compose up -d --build

[+] Building 2.6s (23/23) FINISHED
 => [internal] load local bake definitions                                                                                                       0.0s
 => => reading from stdin 885B                                                                                                                   0.0s
 => [app internal] load build definition from Dockerfile                                                                                         0.0s
 => => transferring dockerfile: 263B                                                                                                             0.0s
 => [api internal] load build definition from Dockerfile                                                                                         0.0s
 => => transferring dockerfile: 290B                                                                                                             0.0s
 => [api internal] load metadata for docker.io/library/python:3.14-slim                                                                          0.0s
 => [app internal] load metadata for docker.io/library/node:24-alpine                                                                            0.0s
 => [app internal] load .dockerignore                                                                                                            0.0s
 => => transferring context: 82B                                                                                                                 0.0s
 => [api internal] load .dockerignore                                                                                                            0.0s
 => => transferring context: 2B                                                                                                                  0.0s
 => [app 1/5] FROM docker.io/library/node:24-alpine@sha256:ebfe2f90462722a7a4de65e91990e97fe0d401c70e0e762c5b53302f905ec1c1                      0.1s
 => => resolve docker.io/library/node:24-alpine@sha256:ebfe2f90462722a7a4de65e91990e97fe0d401c70e0e762c5b53302f905ec1c1                          0.1s
 => [app internal] load build context                                                                                                            0.1s
 => => transferring context: 30.70kB                                                                                                             0.0s
 => [api 1/5] FROM docker.io/library/python:3.14-slim@sha256:a2b82f3c48559aa0a8446d9af49826b6e2b2016f4cd2afabfe6013ec53729170                    0.1s
 => => resolve docker.io/library/python:3.14-slim@sha256:a2b82f3c48559aa0a8446d9af49826b6e2b2016f4cd2afabfe6013ec53729170                        0.1s
 => [api internal] load build context                                                                                                            0.1s
 => => transferring context: 655B                                                                                                                0.0s
 => CACHED [app 2/5] WORKDIR /app                                                                                                                0.0s
 => CACHED [app 3/5] COPY package.json package-lock.json ./                                                                                      0.0s
 => CACHED [app 4/5] RUN npm ci --omit=dev && npm cache clean --force                                                                            0.0s
 => [app 5/5] COPY --chown=node:node . .                                                                                                         0.0s
 => CACHED [api 2/5] WORKDIR /app                                                                                                                0.0s
 => CACHED [api 3/5] COPY requirements.txt .                                                                                                     0.0s
 => CACHED [api 4/5] RUN pip install -r requirements.txt                                                                                         0.0s
 => CACHED [api 5/5] COPY . .                                                                                                                    0.0s
 => [app] exporting to image                                                                                                                     0.6s
 => => exporting layers                                                                                                                          0.1s
 => => exporting manifest sha256:30fc2b30e552f64db78c5b43bafd2ada5445c202a13517f1413cfbbf94b39fd3                                                0.0s
 => => exporting config sha256:ec00425160f63ab1fc89cf3ffb5cd5c91034dfe42b069922b6db604c6512dc94                                                  0.0s
 => => exporting attestation manifest sha256:bcd908d6b45f083d6373facdb8103d3cad7f5c8855744d68614f3c983fe2a3be                                    0.0s
 => => exporting manifest list sha256:ec1d3f8403286973e156b78f0db4566b8815c8e885f10c176b64c2c6cb2a75c5                                           0.0s
 => => naming to docker.io/library/proxy-demo-app:latest                                                                                         0.0s
 => => unpacking to docker.io/library/proxy-demo-app:latest                                                                                      0.4s
 => [api] exporting to image                                                                                                                     2.1s
 => => exporting layers                                                                                                                          0.0s
 => => exporting manifest sha256:89889ca77d8a1fe2e05952bd565d6f4b777e87d2343df4d846ad16bec3752caa                                                0.0s
 => => exporting config sha256:6bc4e896d1388da575d77436bebb27a4b9941ed84896155384aef74eb4c6bf7c                                                  0.0s
 => => exporting attestation manifest sha256:c4130d12dd13346aa1cc105159cb8ff35177f368269cca237584c9e648fd2da7                                    0.0s
 => => exporting manifest list sha256:104bdf1ed74105f0bd21955d695d87d5225e50e4df7ab5715ac86eb551aac340                                           0.0s
 => => naming to docker.io/library/proxy-demo-api:latest                                                                                         0.0s
 => => unpacking to docker.io/library/proxy-demo-api:latest                                                                                      2.1s
 => [app] resolving provenance for metadata file                                                                                                 0.0s
 => [api] resolving provenance for metadata file                                                                                                 0.0s
[+] up 6/6
 ✔ Image proxy-demo-api         Built                                                                                                             2.7s
 ✔ Image proxy-demo-app         Built                                                                                                             2.7s
 ✔ Network proxy-demo_default   Created                                                                                                           0.0s
 ✔ Container proxy-demo-app-1   Started                                                                                                           0.4s
 ✔ Container proxy-demo-api-1   Started                                                                                                           0.7s
 ✔ Container proxy-demo-nginx-1 Started                                                                                                           1.2s
測試各個路徑:
$ docker compose ps
NAME                 IMAGE               COMMAND                  SERVICE   CREATED         STATUS         PORTS
proxy-demo-api-1     proxy-demo-api      "uvicorn main:app --…"   api       7 seconds ago   Up 6 seconds   8000/tcp
proxy-demo-app-1     proxy-demo-app      "docker-entrypoint.s…"   app       7 seconds ago   Up 6 seconds   3000/tcp
proxy-demo-nginx-1   nginx:1.30-alpine   "/docker-entrypoint.…"   nginx     7 seconds ago   Up 5 seconds   0.0.0.0:8080->80/tcp, [::]:8080->80/tcp

$ curl -s http://localhost:8080/
{"message":"Hello from Express","node":"v24.21.0"}

$ curl -s http://localhost:8080/api/
{"message":"Hello from FastAPI"}

$ curl -s "http://localhost:8080/api/items/7?q=proxy"
{"item_id":7,"q":"proxy"}

$ curl -s http://localhost:8080/api/docs | grep -o "<title>.*</title>"
<title>Todo API - Swagger UI</title>ps中app和api的 PORTS 只有3000/tcp、8000/tcp,沒有對應到主機,外部只能透過 Nginx 存取。/轉給 Express;/api/、/api/items/7轉給 FastAPI。- FastAPI 的
/docs也可以透過/api/docs存取。(實際使用時,頁面中引用的/openapi.json路徑需要用 FastAPI 的root_path設定調整。)
實測:proxy_pass 結尾的斜線
proxy_pass http://api:8000/; 結尾有 /,Nginx 會把 location 比對到的 /api/ 換成 /,所以 /api/items/7 轉給後端時變成 /items/7。沒有結尾的 / 則會原樣轉成 /api/items/7,後端沒有這個路徑就會 404。這是最常見的設定錯誤之一,來實際試試看。
把結尾的 / 刪掉,然後重新載入。這裡同時踩到另一個坑:
$ sed -i 's#http://api:8000/;#http://api:8000;#' nginx.conf

$ grep "api:8000" nginx.conf
        proxy_pass http://api:8000;

$ docker compose exec nginx grep "api:8000" /etc/nginx/conf.d/default.conf
        proxy_pass http://api:8000/;

$ docker compose restart nginx
 Container proxy-demo-nginx-1 Restarting
 Container proxy-demo-nginx-1 Started

$ docker compose exec nginx grep "api:8000" /etc/nginx/conf.d/default.conf
        proxy_pass http://api:8000;

$ curl -s "http://localhost:8080/api/items/7?q=proxy"
{"detail":"Not Found"}

$ docker compose logs --tail 1 api
api-1  | INFO:     172.19.0.4:44428 - "GET /api/items/7?q=proxy HTTP/1.1" 404 Not Found
依序說明:
- 用
sed -i修改主機上的nginx.conf,grep確認已經改好。 - 但容器內的
/etc/nginx/conf.d/default.conf還是舊的。原因是sed -i(還有 vim 等許多編輯器)存檔時會建立一個新檔案取代舊檔案,而單一檔案的掛載綁定的是原本那個檔案,容器看不到新檔案。這時就算執行nginx -s reload也沒用。 docker compose restart nginx重啟容器,重新掛載後才看到新內容。- 少了結尾斜線,
/api/items/7?q=proxy回傳{"detail":"Not Found"}。 - FastAPI 的日誌證實它收到的是
GET /api/items/7,而不是/items/7。
避免單一檔案掛載的問題:改成掛載整個資料夾,例如
./nginx:/etc/nginx/conf.d:ro,資料夾裡的檔案被取代時容器也看得到;或者修改設定後一律重啟容器。
502 Bad Gateway
502 表示 Nginx 有收到請求,但連不到後端。實測幾種常見情況。
後端的連接埠寫錯(把 app:3000 改成 app:3001 後重啟 Nginx):
$ curl -s -o /dev/null -w "%{http_code} %{time_total}s\n" http://localhost:8080/
502 0.001010s

$ docker compose logs nginx 2>&1 | grep "\[error\]" | tail -n 1
nginx-1  | 2026/10/13 00:43:32 [error] 21#21: *1 connect() failed (111: Connection refused) while connecting to upstream, client: 172.19.0.1, server: , request: "GET / HTTP/1.1", upstream: "http://172.19.0.2:3001/", host: "localhost:8080"
立即回傳 502,錯誤日誌是 Connection refused:找得到 app 這台主機,但 3001 埠沒有程式在監聽。後端程式只綁定 127.0.0.1,或還在啟動中時,也是同樣的錯誤。

後端容器停止了:
$ docker compose stop app
 Container proxy-demo-app-1 Stopping
 Container proxy-demo-app-1 Stopped

$ curl -s -o /dev/null -w "%{http_code} %{time_total}s\n" http://localhost:8080/
502 3.062307s

$ docker compose logs nginx 2>&1 | grep "\[error\]" | tail -n 1
nginx-1  | 2026/10/13 00:43:39 [error] 20#20: *1 connect() failed (113: Host is unreachable) while connecting to upstream, client: 172.19.0.1, server: , request: "GET / HTTP/1.1", upstream: "http://172.19.0.2:3000/", host: "localhost:8080"
約 3 秒後回傳 502,錯誤是 Host is unreachable。Nginx 啟動時已經把 app 解析成 IP 並記住,容器停止後那個 IP 沒有回應。如果網路沒有立即回報無法連線,Nginx 會一直等到逾時(預設 60 秒),回傳的就是 504 Gateway Timeout。
後端服務根本不存在(只啟動 Nginx,不啟動 app 和 api):
$ docker compose up -d --no-deps nginx
 Container proxy-demo-nginx-1 Started

$ docker compose ps -a nginx
NAME                 IMAGE               COMMAND                  SERVICE   CREATED         STATUS                                  PORTS
proxy-demo-nginx-1   nginx:1.30-alpine   "/docker-entrypoint.…"   nginx     3 seconds ago   Restarting (1) Less than a second ago

$ docker compose logs nginx 2>&1 | grep emerg | head -n 2
nginx-1  | 2026/10/13 00:43:48 [emerg] 1#1: host not found in upstream "app" in /etc/nginx/conf.d/default.conf:5
nginx-1  | nginx: [emerg] host not found in upstream "app" in /etc/nginx/conf.d/default.conf:5
這次 Nginx 連啟動都失敗:host not found in upstream "app"。Nginx 啟動時就要解析 proxy_pass 中的主機名稱,解析不到就拒絕啟動,容器因為 restart: unless-stopped 而不斷重啟(Restarting (1))。
排查 502 的順序:
- 後端容器是否在執行:
docker compose ps proxy_pass的服務名稱與連接埠是否正確(用的是容器內的連接埠,不是ports對應的主機連接埠)- 後端是否監聽
0.0.0.0,而不是127.0.0.1 - Nginx 與後端是否在同一個網路,參考 網路與容器互連
- 看 Nginx 的錯誤日誌:
docker compose logs nginx | grep error
HTTPS:使用 Caddy 自動取得憑證
在 Nginx 上使用 Let's Encrypt 憑證需要另外設定 certbot、定期更新與重新載入。如果只是想快速加上 HTTPS,Caddy 會自動申請、安裝與更新憑證,設定也短很多。
Caddyfile:
example.com {
    reverse_proxy app:3000
}compose.yaml:
services:
  caddy:
    image: caddy:2
    ports:
      - "80:80"
      - "443:443"
    volumes:
      - ./Caddyfile:/etc/caddy/Caddyfile:ro
      - caddy_data:/data
      - caddy_config:/config
    restart: unless-stopped

  app:
    build: ./app
    restart: unless-stopped

volumes:
  caddy_data:
  caddy_config:
使用真實網域的條件:
- 網域的 DNS 已經指向這台主機。
- 80 和 443 埠可以從網際網路連線(Let's Encrypt 要透過它們驗證)。
caddy_data保存憑證,不要刪除,否則每次重建都要重新申請,可能觸發 Let's Encrypt 的頻率限制。
在本機試用
本機沒有真實網域時,可以把 Caddyfile 中的網域寫成 localhost。Caddy 會自己建立一個本機憑證機構並簽發憑證:
localhost {
    reverse_proxy app:3000
}
$ docker compose up -d
[+] up 5/5
✔ Network caddy-demo_default Created 0.0s
✔ Volume caddy-demo_caddy_config Created 0.0s
✔ Volume caddy-demo_caddy_data Created 0.0s
✔ Container caddy-demo-caddy-1 Started 0.3s
✔ Container caddy-demo-app-1 Started 0.6s
$ curl -sk https://localhost/
{"message":"Hello from Express","node":"v24.21.0"}
$ curl -sI http://localhost/ | head -n 3
HTTP/1.1 308 Permanent Redirect
Connection: close
Location: https://localhost/
$ docker compose logs caddy 2>&1 | grep -oE '"msg":"(enabling automatic[^"]*|obtaining certificate|certificate obtained successfully)"'
"msg":"enabling automatic HTTP->HTTPS redirects"
"msg":"enabling automatic TLS certificate management"
"msg":"obtaining certificate"
"msg":"certificate obtained successfully"
$ curl -svk https://localhost/ 2>&1 | grep -E "issuer|subject:"
* subject:
* issuer: CN=Caddy Local Authority - ECC Intermediatehttps://localhost/成功轉到 Express。因為憑證不是公開憑證機構簽發的,curl要加-k略過驗證,瀏覽器也會顯示警告。http://的請求自動得到308 Permanent Redirect轉到https://,不用另外設定。- 日誌顯示 Caddy 自動啟用了 HTTP→HTTPS 轉址與憑證管理,並取得了憑證。
- 憑證的簽發者是
Caddy Local Authority。換成真實網域時,就會改成向 Let's Encrypt 申請。
Caddy 的 reverse_proxy 預設就會傳遞 X-Forwarded-For、X-Forwarded-Proto 等標頭,不需要像 Nginx 一樣逐一設定。
重點回顧
- 官方映像檔會載入
/etc/nginx/conf.d/*.conf,也支援templates/*.conf.template的環境變數替換。 - SPA 用
try_files $uri $uri/ /index.html;expires與add_header Cache-Control不要同時用。 proxy_pass結尾有/會去掉 location 前綴。- 只讓反向代理對外開放連接埠。
動手練習
練習 1:把反向代理範例中 FastAPI 的路徑從 /api/ 改成 /backend/,需要修改哪裡?
答案
只要修改 nginx.conf 的 location /api/ 為 location /backend/,proxy_pass http://api:8000/; 保持結尾的 /,然後 docker compose exec nginx nginx -s reload(單一檔案掛載時改用 docker compose restart nginx)。
練習 2:怎麼只用一個指令檢查一個 nginx 設定檔有沒有語法錯誤,而不啟動網站?
答案
docker run --rm -v "$(pwd)/default.conf:/etc/nginx/conf.d/default.conf:ro" nginx:1.30-alpine nginx -t常見問題
修改 nginx.conf 後要重啟容器嗎?
先 docker exec 容器 nginx -t 檢查,再 nginx -s reload 即可,不必重啟。但單一檔案掛載時,編輯器存檔可能讓容器看不到新檔案,實測見本章。
502 Bad Gateway 是什麼意思?
Nginx 連不到後端。檢查後端容器是否在執行、proxy_pass 的服務名稱與容器內連接埠、後端是否監聽 0.0.0.0。
Nginx 和 Caddy 該選哪個?
需要細緻控制、團隊熟悉 Nginx 就用 Nginx;只想快速加上 HTTPS,Caddy 設定短很多並自動更新憑證。
更新於 2026年10月14日