Contents
Docker Compose Tutorial: Manage Multiple Containers with One File
A real application usually has more than one container: a website, a database, a cache, and so on. You have to remember a long list of docker run options for each one, create a network and volumes first, and pay attention to startup order.
Docker Compose lets you put these settings in one YAML file and start everything with one command:
docker compose up -dInstallation and version
- Docker Desktop (Windows, macOS) includes Compose.
- Linux: Follow the steps in Install Docker to install
docker-compose-plugin.
$ docker compose version
Docker Compose version v5.6.0
The old standalone program was called
docker-compose(with a hyphen, v1) and is no longer maintained. Usedocker compose(with a space) now. Compose version numbers jumped from v2 to v5; usage has not changed. Older tutorials online mix the two, but their commands and options are mostly the same.
Example project: website + database + admin interface
Create a compose-demo folder with this structure:
compose-demo/
├── compose.yaml
└── site/
    └── index.html
Put a simple webpage (any content) in site/index.html. Here is compose.yaml:
services:
  web:
    image: nginx:1.30-alpine
    ports:
      - "8080:80"
    volumes:
      - ./site:/usr/share/nginx/html:ro

  db:
    image: postgres:18
    environment:
      POSTGRES_PASSWORD: example
    volumes:
      - pgdata:/var/lib/postgresql

  adminer:
    image: adminer
    ports:
      - "8081:8080"
    depends_on:
      - db

volumes:
  pgdata:
Three services:
| Service | Purpose |
|---|---|
web | nginx serves the ./site folder as the website on host port 8080 |
db | PostgreSQL 18; data is stored in a volume named pgdata (note that version 18 mounts /var/lib/postgresql; see Volumes) |
adminer | Web-based database management tool on host port 8081 |
To write the same setup with docker run, you would first need to run docker network create and docker volume create, then run three long docker run commands.
Start the stack: docker compose up
Run this in the compose-demo folder:
$ docker compose up -d
[+] up 34/34
 ✔ Image nginx:1.30-alpine          Pulled                                                      7.8s
 ✔ Image adminer                    Pulled                                                      8.7s
 ✔ Network compose-demo_default     Created                                                     0.1s
 ✔ Volume compose-demo_pgdata       Created                                                     0.0s
 ✔ Container compose-demo-web-1     Started                                                     1.7s
 ✔ Container compose-demo-db-1      Started                                                     0.8s
 ✔ Container compose-demo-adminer-1 Started                                                     1.0s
One command did it all: downloaded images (Pulled, which appears only the first time), created a network and volume, and started three containers.
$ docker compose ps
NAME                     IMAGE               COMMAND                  SERVICE   CREATED          STATUS          PORTS
compose-demo-adminer-1   adminer             "entrypoint.sh docke…"   adminer   10 seconds ago   Up 9 seconds    0.0.0.0:8081->8080/tcp, [::]:8081->8080/tcp
compose-demo-db-1        postgres:18         "docker-entrypoint.s…"   db        10 seconds ago   Up 10 seconds   5432/tcp
compose-demo-web-1       nginx:1.30-alpine   "/docker-entrypoint.…"   web       10 seconds ago   Up 9 seconds    0.0.0.0:8080->80/tcp, [::]:8080->80/tcp

$ docker network ls --filter name=compose-demo
NETWORK ID     NAME                   DRIVER    SCOPE
a722da926fbd   compose-demo_default   bridge    local

$ docker volume ls --filter name=compose-demo
DRIVER    VOLUME NAME
local compose-demo_pgdata- Container names follow the pattern
project-name-service-name-number. By default, the project name is the folder name (compose-demo), so projects in different folders do not interfere with each other. - Compose automatically created the
compose-demo_defaultnetwork. All three services are on it and can connect to each other by service name. - The actual name of the
pgdatavolume iscompose-demo_pgdata. dbhas noportssetting, so the PORTS column shows only5432/tcp; it cannot be reached externally.
Open http://localhost:8080:

Manage the database with Adminer
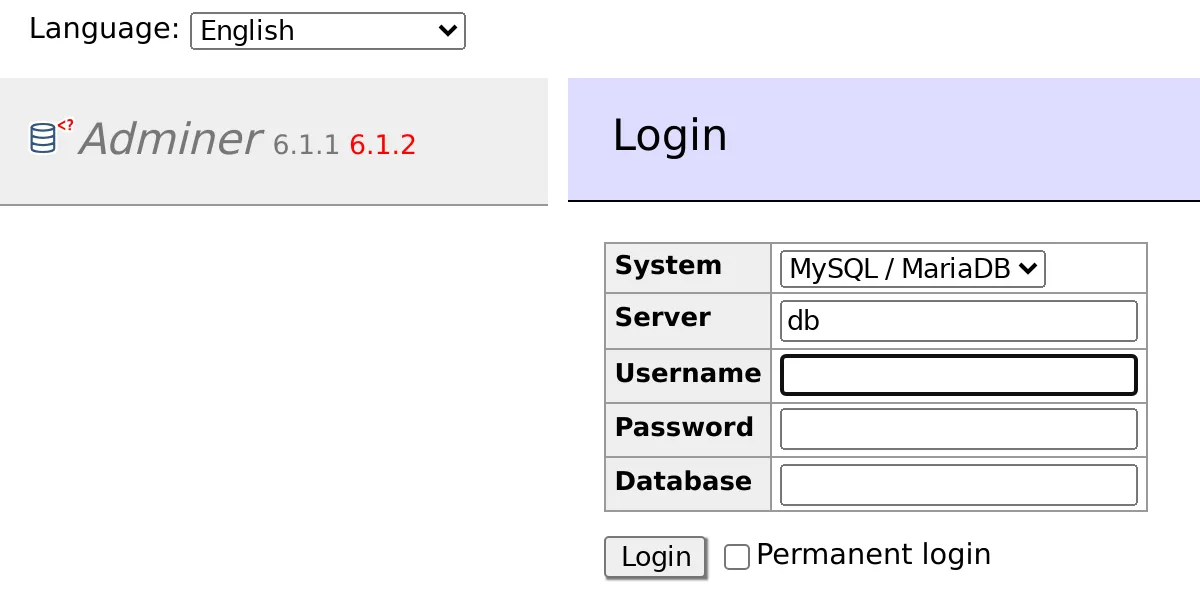
Open http://localhost:8081 to see the Adminer login screen. Note that System defaults to MySQL:
Log in with these settings:
| Field | Value |
|---|---|
| System | PostgreSQL (you must change this, or the MySQL connection will fail) |
| Server | db (the service name, resolved through the Compose network) |
| Username | postgres |
| Password | example (POSTGRES_PASSWORD in compose.yaml) |
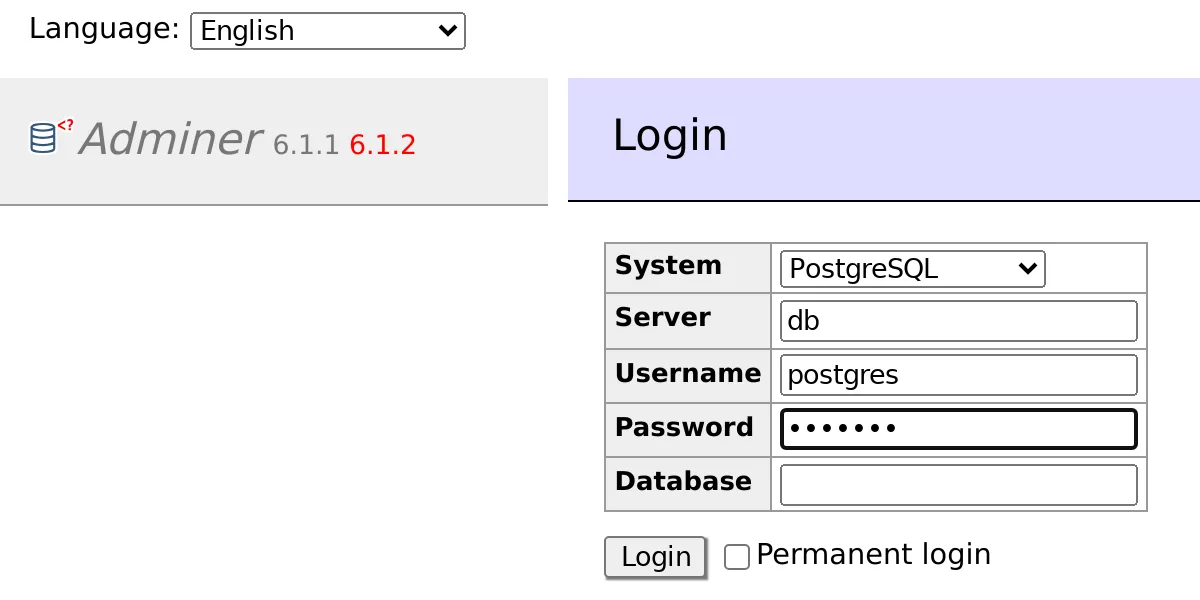
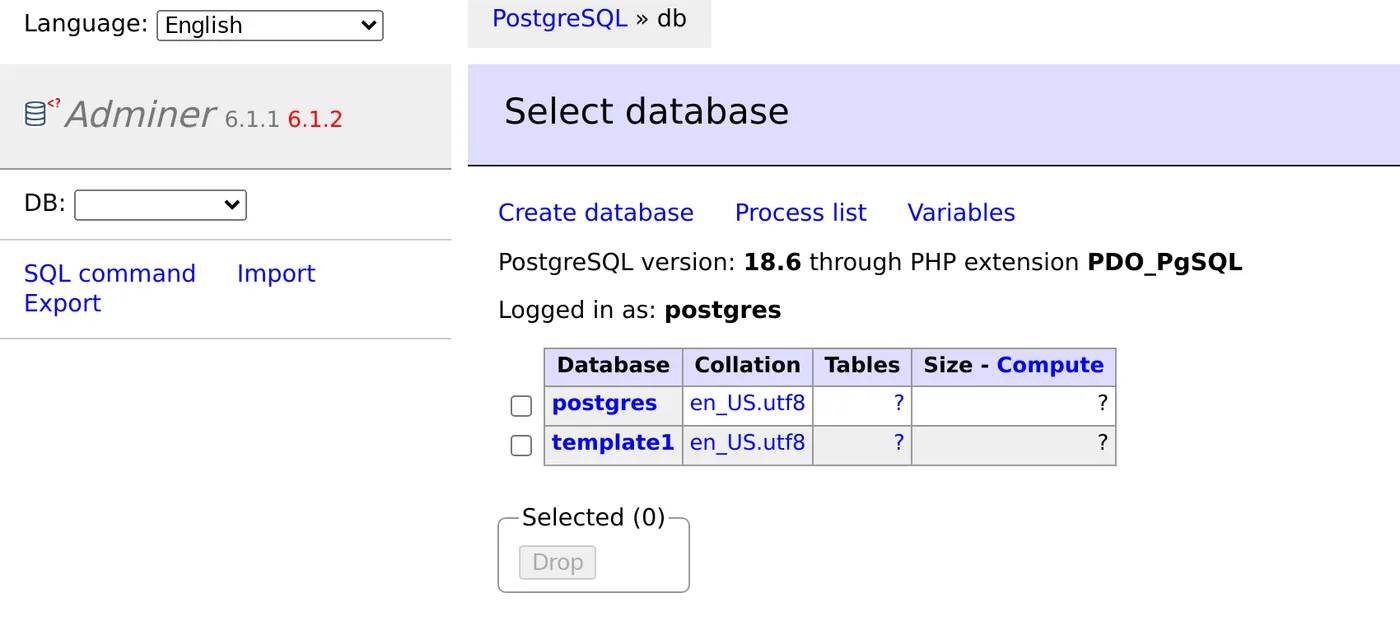
After a successful login, the screen shows the PostgreSQL version and database list:
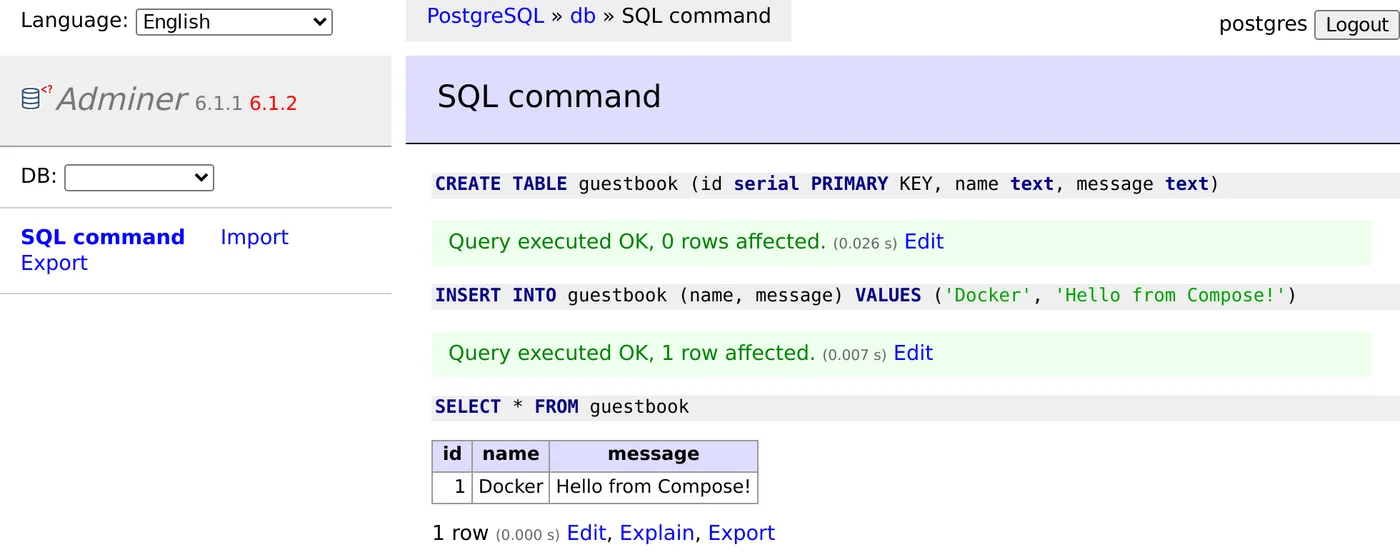
Click SQL command on the left and enter this SQL:
CREATE TABLE guestbook (id serial PRIMARY KEY, name text, message text);
INSERT INTO guestbook (name, message) VALUES ('Docker', 'Hello from Compose!');
SELECT * FROM guestbook;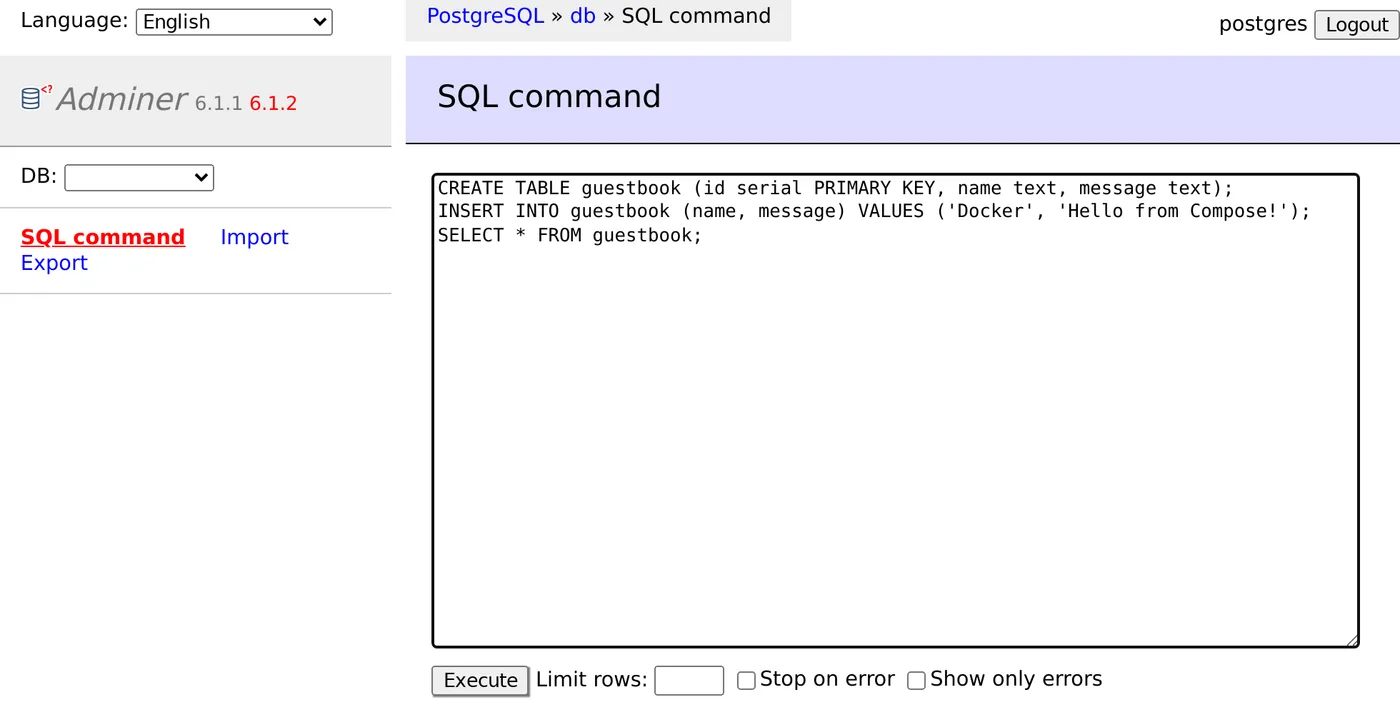
Click Execute to run the three commands in order. The final SELECT lists the row you just added:
View logs
$ docker compose logs --tail 2
web-1  | 2026/10/13 00:14:23 [notice] 1#1: start worker processes
web-1  | 2026/10/13 00:14:23 [notice] 1#1: start worker process 30
db-1   | 2026-10-13 00:14:24.205 UTC [71] LOG:  database system was shut down at 2026-10-13 00:14:24 UTC
db-1   | 2026-10-13 00:14:24.210 UTC [1] LOG:  database system is ready to accept connections
adminer-1  | [Tue Oct 13 00:14:22 2026] PHP 8.4.26 Development Server (http://[::]:8080) started
docker compose logs combines logs from all services and prefixes each line with the service name. --tail 2 shows only the last two lines from each service. Use -f to follow the logs continuously, or docker compose logs db to view only db.
Stop and start
$ docker compose stop
[+] stop 3/3
 ✔ Container compose-demo-adminer-1 Stopped                                                     0.4s
 ✔ Container compose-demo-web-1     Stopped                                                     0.4s
 ✔ Container compose-demo-db-1      Stopped                                                     0.3s

$ docker compose ps -a
NAME                     IMAGE               COMMAND                  SERVICE   CREATED          STATUS                              PORTS
compose-demo-adminer-1   adminer             "entrypoint.sh docke…"   adminer   53 seconds ago   Exited (0) Less than a second ago
compose-demo-db-1        postgres:18         "docker-entrypoint.s…"   db        53 seconds ago   Exited (0) Less than a second ago
compose-demo-web-1       nginx:1.30-alpine   "/docker-entrypoint.…"   web       53 seconds ago   Exited (0) Less than a second ago

$ docker compose start
[+] start 3/3
 ✔ Container compose-demo-db-1      Started                                                     0.3s
 ✔ Container compose-demo-web-1     Started                                                     1.0s
 ✔ Container compose-demo-adminer-1 Started                                                     0.4s
stop only stops the containers (Exited (0)); the containers, network, and volume remain. Run start to start them again.
down: remove containers, keep data
$ docker compose down
[+] down 4/4
 ✔ Container compose-demo-adminer-1 Removed                                                     0.7s
 ✔ Container compose-demo-web-1     Removed                                                     0.7s
 ✔ Container compose-demo-db-1      Removed                                                     0.3s
 ✔ Network compose-demo_default     Removed                                                     0.1s
down removes the containers and network, but does not remove the volume. Run up again and the data is still there:
$ docker compose up -d
[+] up 4/4
 ✔ Network compose-demo_default     Created                                                     0.1s
 ✔ Container compose-demo-web-1     Started                                                     0.7s
 ✔ Container compose-demo-db-1      Started                                                     1.1s
 ✔ Container compose-demo-adminer-1 Started                                                     1.6s

$ docker compose exec db psql -U postgres -c "SELECT * FROM guestbook;"
 id |  name  |       message
----+--------+---------------------
  1 | Docker | Hello from Compose!
(1 row)
down -v: remove the data too
$ docker compose down -v
[+] down 5/5
 ✔ Container compose-demo-adminer-1 Removed                                                     0.7s
 ✔ Container compose-demo-web-1     Removed                                                     0.7s
 ✔ Container compose-demo-db-1      Removed                                                     0.2s
 ✔ Volume compose-demo_pgdata       Removed                                                     0.1s
 ✔ Network compose-demo_default     Removed                                                     0.1s
Adding -v also removes the compose-demo_pgdata volume, so the database data is gone. Use down -v with care in production.
Basic commands at a glance
docker compose up -d        # Create and start all services in the background
docker compose ps           # Check service status
docker compose logs -f      # Follow logs from all services
docker compose logs -f db   # View only db
docker compose stop         # Stop (keep containers)
docker compose start        # Start again
docker compose down         # Stop and remove containers and network (keep volume)
docker compose down -v      # Remove the volume too (data will be lost!)
After changing compose.yaml, run docker compose up -d again. Compose will recreate only the services that changed (see Docker Compose commands for an example).
Project and file names
- By default, the project name is the folder name. You can also set
name: myprojectat the top ofcompose.yaml, or usedocker compose -p myproject. - By default, Compose searches for
compose.yaml,compose.yml,docker-compose.yaml, thendocker-compose.yml. For new projects,compose.yamlis recommended. - The
version: "3.8"line at the start of a file is from the old format and is no longer needed. Including it only produces a warning.
Next steps
- Complete reference for compose.yaml syntax: build, ports, volumes, environment, depends_on, healthcheck, and more
- Common docker compose commands
- Hands-on: Set up WordPress with Compose
Recap
- compose.yaml describes multiple services, networks, and volumes. Start them all with one command.
- Compose automatically creates a project network, and services connect to each other by service name.
docker compose downkeeps volumes;down -vdeletes the data.- Docker Desktop displays Compose projects as groups.
Exercises
Exercise 1: In this chapter's project, use one command to view only the last five lines of logs for the db service.
Answer
docker compose logs --tail 5 dbExercise 2: After running docker compose down and then up -d, is the table you created in Adminer still there? What about after down -v?
Answer
The data is still there after down because the pgdata volume is kept. down -v removes the volume, so the database is initialized again and the table is gone.
FAQ
What's the difference between docker-compose and docker compose?
docker-compose (with a hyphen) is the standalone v1 program that is no longer maintained. Use the Docker CLI plugin docker compose (with a space) instead. This tutorial uses v5.
Can I use either compose.yaml or docker-compose.yml?
Yes. Compose searches for them in order. For new projects, compose.yaml is recommended.
How is the project name determined?
By default, it is the name of the folder containing compose.yaml. Container, network, and volume names are prefixed with it. You can specify a name with name: or -p.
Updated October 14, 2026