Contents
WordPress with Docker Compose Tutorial: Set Up WordPress and MySQL
This section uses Docker Compose to set up a complete WordPress site. When you're done, you'll have:
- WordPress (PHP + Apache, using the official
wordpress:7-apacheimage) - A MySQL 8.4 database with a health check, so WordPress starts only when the database is ready
- Data stored in Volumes, so it isn't lost if you remove and recreate the containers
- A 64 MB file upload limit
- A phpMyAdmin admin interface that starts only when you need it
The Compose syntax used here (depends_on, healthcheck, profiles, .env) is covered in Getting started with Compose and docker compose commands.
Create the project
Create a wordpress directory and add three files:
wordpress/
├── compose.yaml
├── .env
└── uploads.ini
.env: passwords
MYSQL_ROOT_PASSWORD=change-this-root-password
MYSQL_PASSWORD=change-this-wp-password
Replace these with your own passwords. Compose automatically reads .env in the same directory and substitutes its values for variables such as ${MYSQL_PASSWORD} in compose.yaml. Don't commit .env to Git.
uploads.ini: upload size
The WordPress image defaults to a PHP upload limit of only 2 MB, so larger images or themes will fail to upload. Override it with an ini file:
upload_max_filesize = 64M
post_max_size = 64M
memory_limit = 256M
The official PHP image reads all .ini files under /usr/local/etc/php/conf.d/, so you only need to mount this file there.
compose.yaml
services:
  db:
    image: mysql:8.4
    environment:
      MYSQL_ROOT_PASSWORD: ${MYSQL_ROOT_PASSWORD}
      MYSQL_DATABASE: wordpress
      MYSQL_USER: wordpress
      MYSQL_PASSWORD: ${MYSQL_PASSWORD}
    volumes:
      - db_data:/var/lib/mysql
    healthcheck:
      test: ["CMD", "mysqladmin", "ping", "-h", "127.0.0.1", "-uroot", "-p${MYSQL_ROOT_PASSWORD}"]
      interval: 10s
      timeout: 5s
      retries: 10
      start_period: 30s
    restart: unless-stopped

  wordpress:
    image: wordpress:7-apache
    depends_on:
      db:
        condition: service_healthy
    ports:
      - "8080:80"
    environment:
      WORDPRESS_DB_HOST: db
      WORDPRESS_DB_NAME: wordpress
      WORDPRESS_DB_USER: wordpress
      WORDPRESS_DB_PASSWORD: ${MYSQL_PASSWORD}
    volumes:
      - wp_data:/var/www/html
      - ./uploads.ini:/usr/local/etc/php/conf.d/uploads.ini:ro
    restart: unless-stopped

  phpmyadmin:
    image: phpmyadmin
    depends_on:
      - db
    ports:
      - "127.0.0.1:8081:80"
    environment:
      PMA_HOST: db
    profiles: [tools]

volumes:
  db_data:
  wp_data:
Here's what matters:
| Setting | Purpose |
|---|---|
MYSQL_DATABASE / MYSQL_USER / MYSQL_PASSWORD | The MySQL image automatically creates the database and account the first time it starts with an empty data directory |
healthcheck | Runs mysqladmin ping every 10 seconds to check whether MySQL accepts connections. Use -h 127.0.0.1 instead of localhost; otherwise, MySQL may be marked healthy before initialization finishes. See MySQL for details |
condition: service_healthy | Waits for db to become healthy before starting WordPress, so WordPress doesn't start before it can connect to the database |
WORDPRESS_DB_HOST: db | Connects using the service name db, which Compose's network automatically resolves to the MySQL container's IP address |
db_data:/var/lib/mysql | Stores MySQL data in a Volume |
wp_data:/var/www/html | Stores WordPress files, plugins, themes, and uploaded media in a Volume |
profiles: [tools] | phpMyAdmin doesn't start by default; add --profile tools to start it |
127.0.0.1:8081:80 | Binds phpMyAdmin to localhost so it can't be reached externally |
WordPress accesses MySQL only on the internal Compose network, so db has no ports setting and isn't exposed externally.
Start the services
Run this from the wordpress directory:
$ docker compose up -d
[+] up 32/32
 ✔ Image wordpress:7-apache        Pulled                                                                                                        28.0s
 ✔ Network wordpress_default       Created                                                                                                        0.1s
 ✔ Volume wordpress_db_data        Created                                                                                                        0.0s
 ✔ Volume wordpress_wp_data        Created                                                                                                        0.0s
 ✔ Container wordpress-db-1        Healthy                                                                                                       11.1s
 ✔ Container wordpress-wordpress-1 Started                                                                                                       11.3s
Notice the order: Compose first creates the network and two Volumes. wordpress-db-1 takes 11 seconds to become Healthy, and only then does wordpress-wordpress-1 show Started. That's the effect of condition: service_healthy. The first run takes longer because it needs to download the images.
Check the status:
$ docker compose ps
NAME                    IMAGE                COMMAND                  SERVICE     CREATED          STATUS                    PORTS
wordpress-db-1          mysql:8.4            "docker-entrypoint.s…"   db          16 seconds ago   Up 16 seconds (healthy)   3306/tcp, 33060/tcp
wordpress-wordpress-1   wordpress:7-apache   "docker-entrypoint.s…"   wordpress   16 seconds ago   Up 5 seconds              0.0.0.0:8080->80/tcp, [::]:8080->80/tcp
The db STATUS shows (healthy), and PORTS lists only the container's internal 3306/tcp, with no host mapping. The wordpress service maps host port 8080 to container port 80.
Both Volumes are also ready. Their names follow the pattern project-name_volume-name; by default, the project name is the directory name:
$ docker volume ls
DRIVER    VOLUME NAME
local     wordpress_db_data
local     wordpress_wp_data
Complete the installation in your browser
Open http://localhost:8080. The first screen asks you to choose a language. Select the language you want for the admin area (for example, “Traditional Chinese”) and click Continue. The screenshots in this tutorial use English (United States) so they can be shared across language versions.
Next, enter your site information:
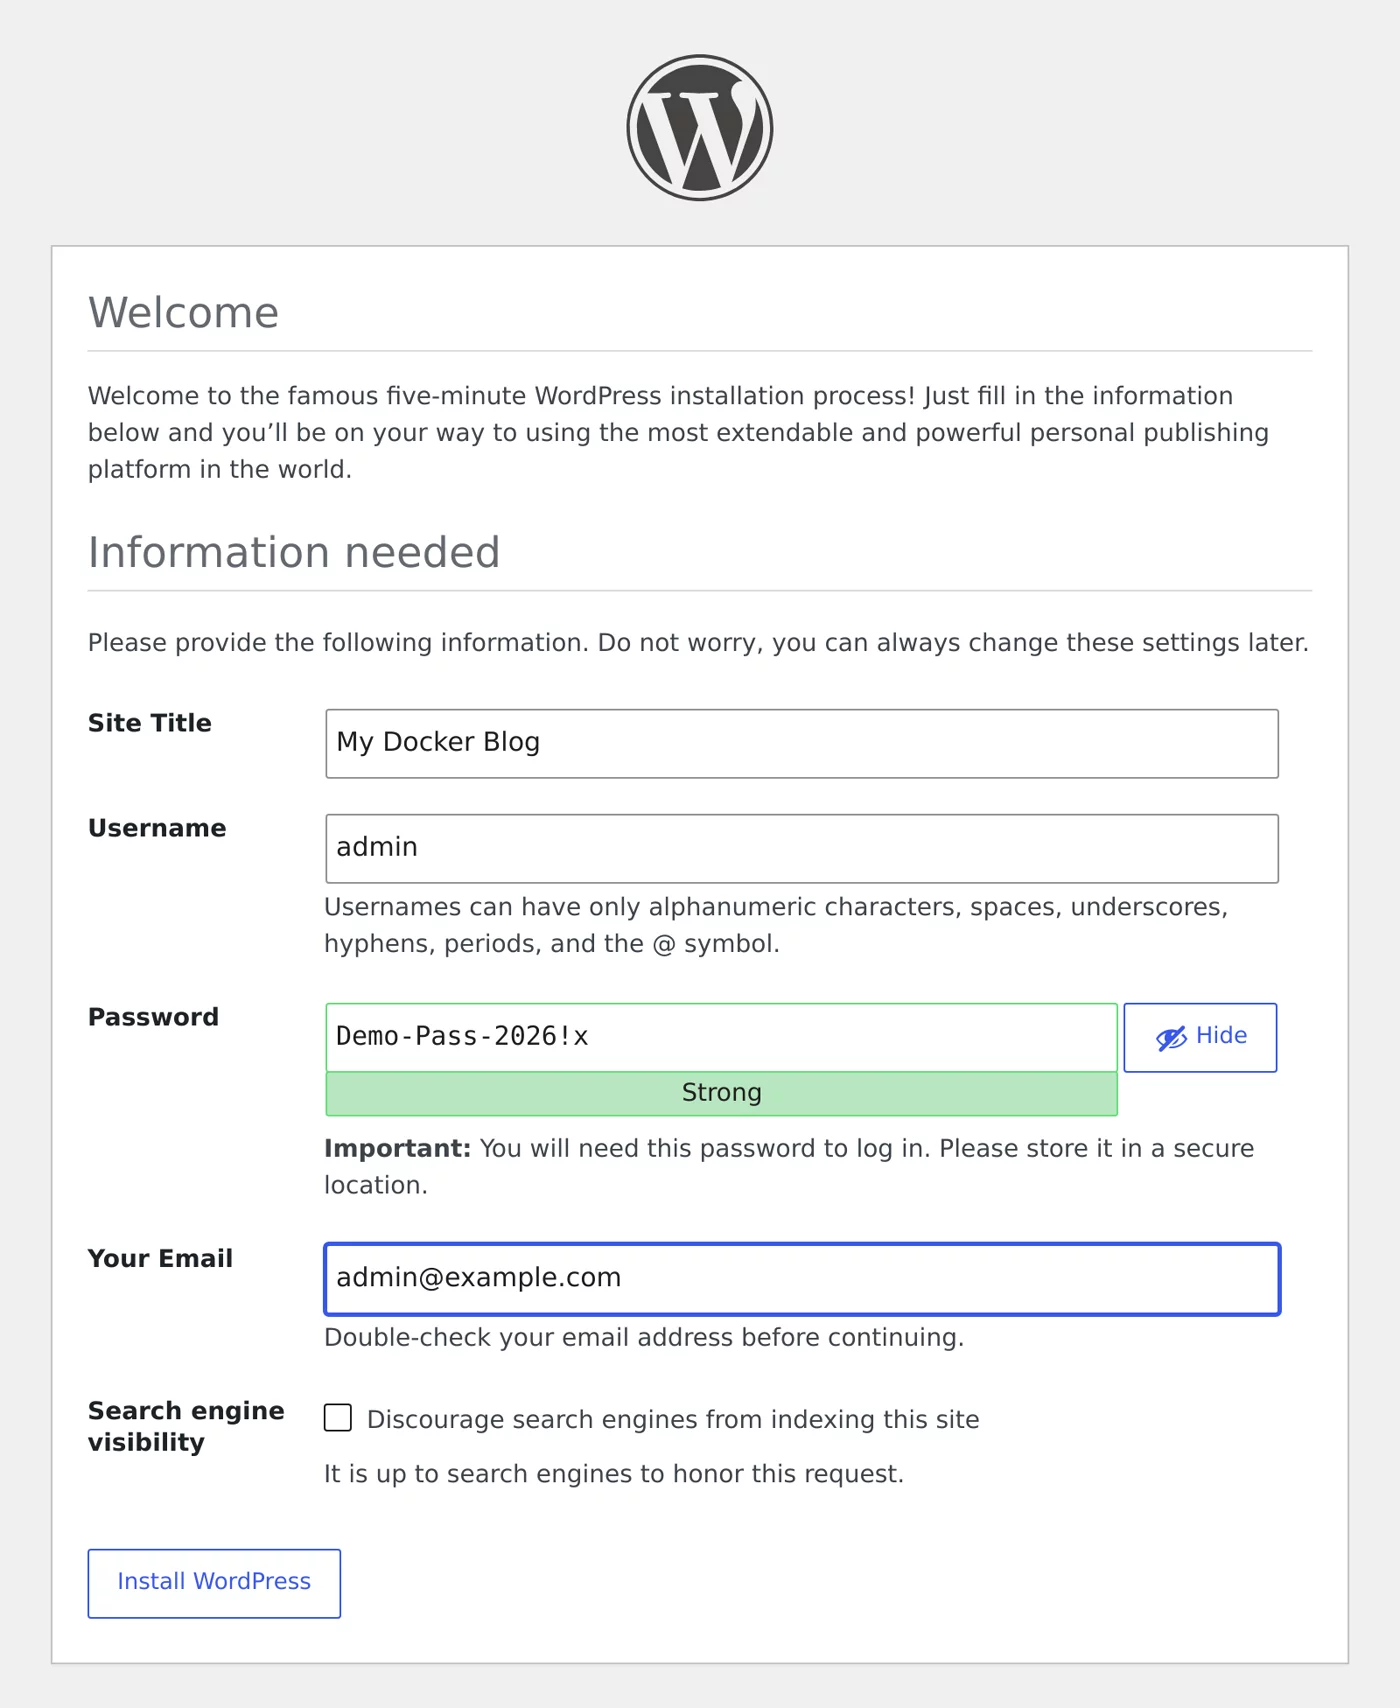
| Field | Description |
|---|---|
| Site Title | The site title; you can change it later in the admin area |
| Username | The administrator account. Don't use admin; it's easy to guess (it's used here only as an example) |
| Password | The administrator password; WordPress displays its strength |
| Your Email | The administrator's email address for notifications and password resets |
| Search engine visibility | Select this to ask search engines not to index the site. You can select it while the site is still being tested |
You won't see a database settings screen because the WORDPRESS_DB_* environment variables provide the connection details, and the image automatically generates wp-config.php when it starts.
After you click Install WordPress, the Success screen confirms that installation is complete:
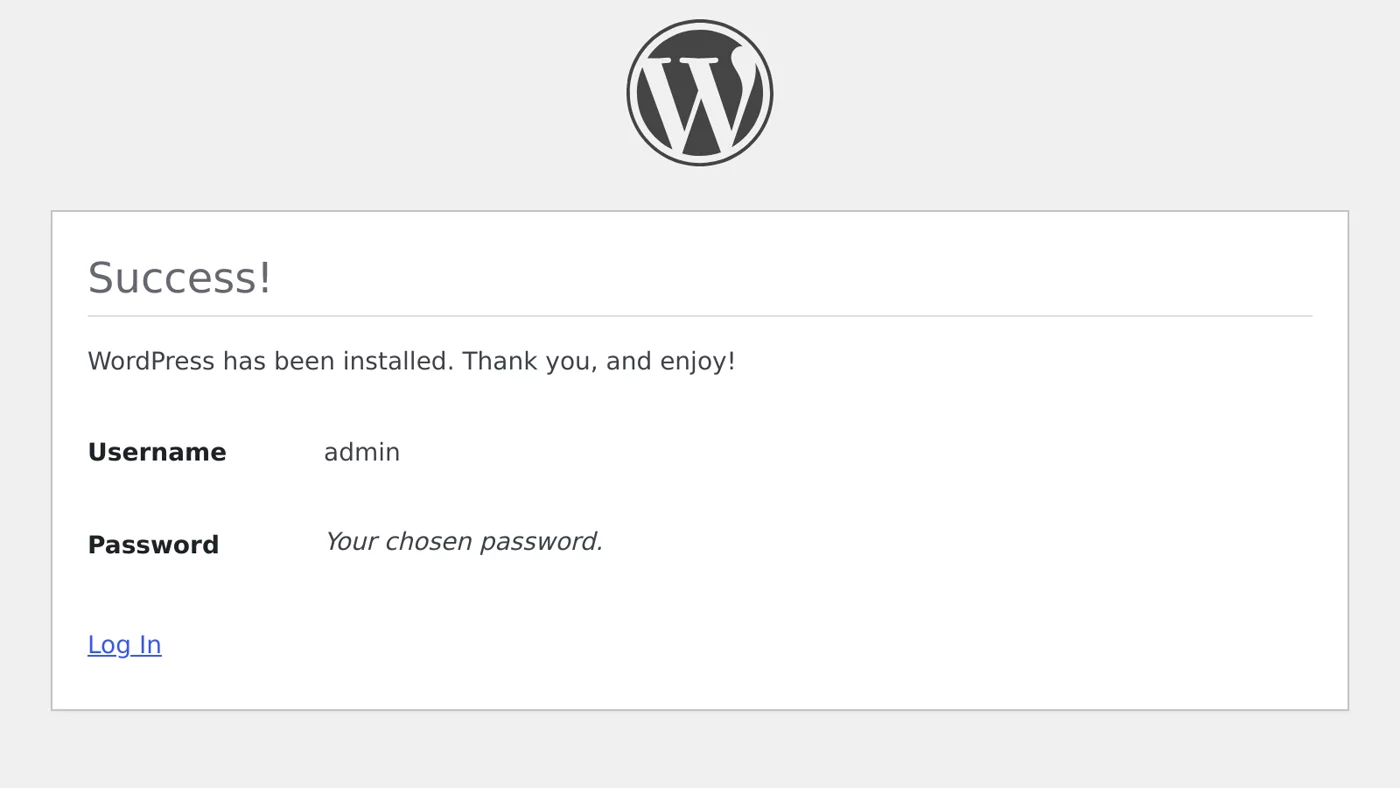
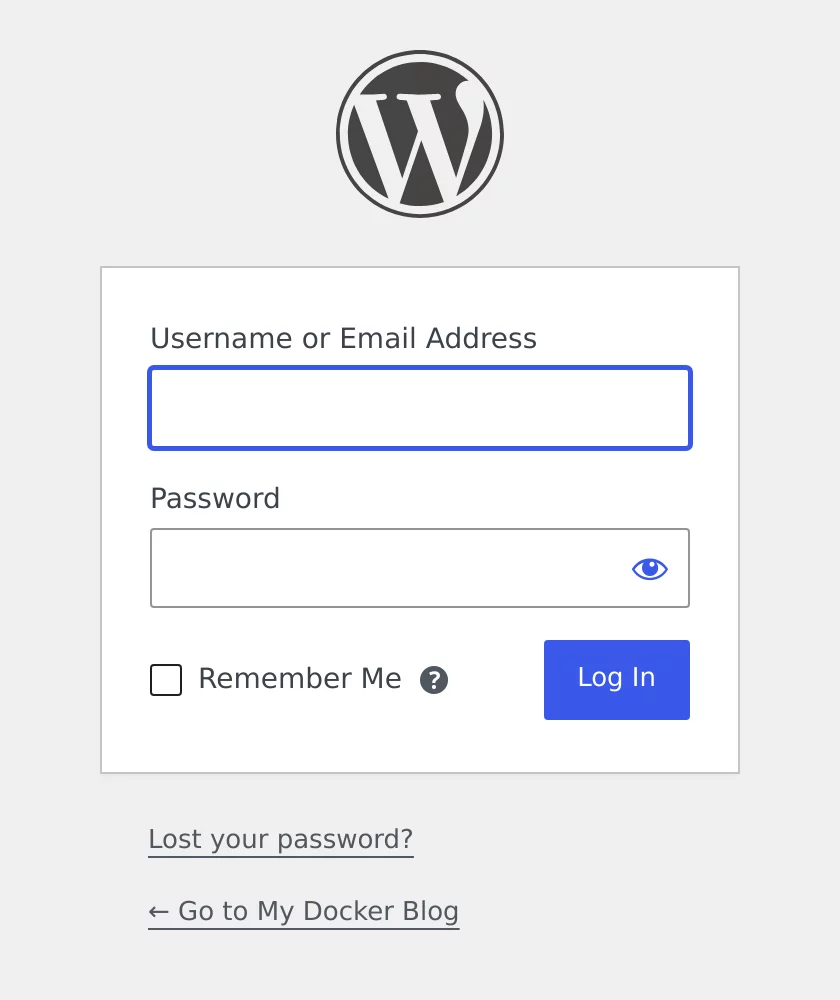
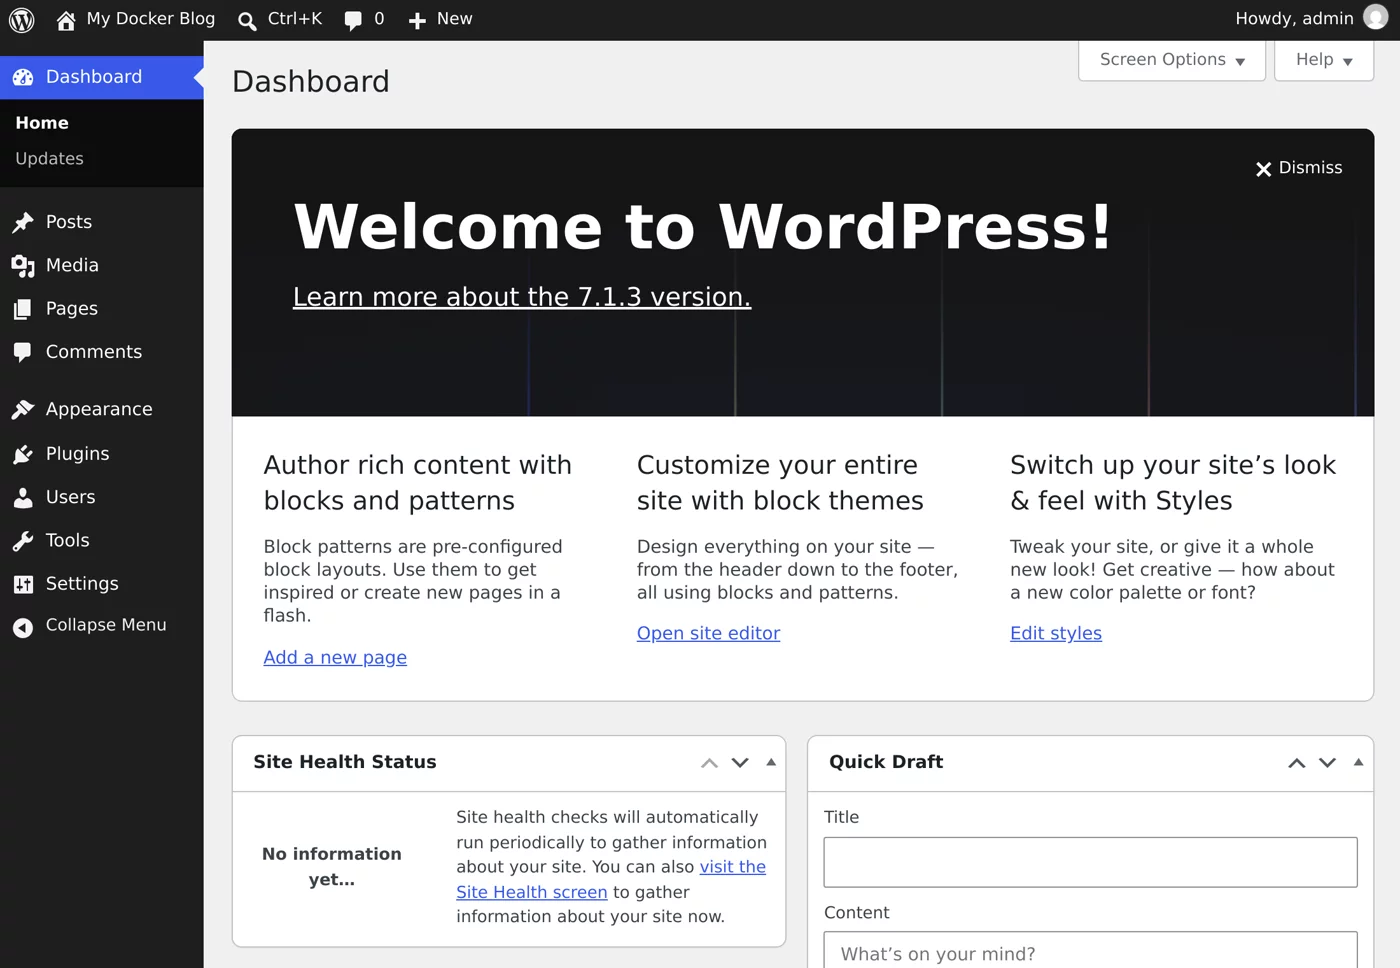
http://localhost:8080/wp-login.phpSign in with the username and password you just set to open the admin dashboard. The welcome panel shows version 7.1.3, the version included in the wordpress:7-apache image at the time of writing:
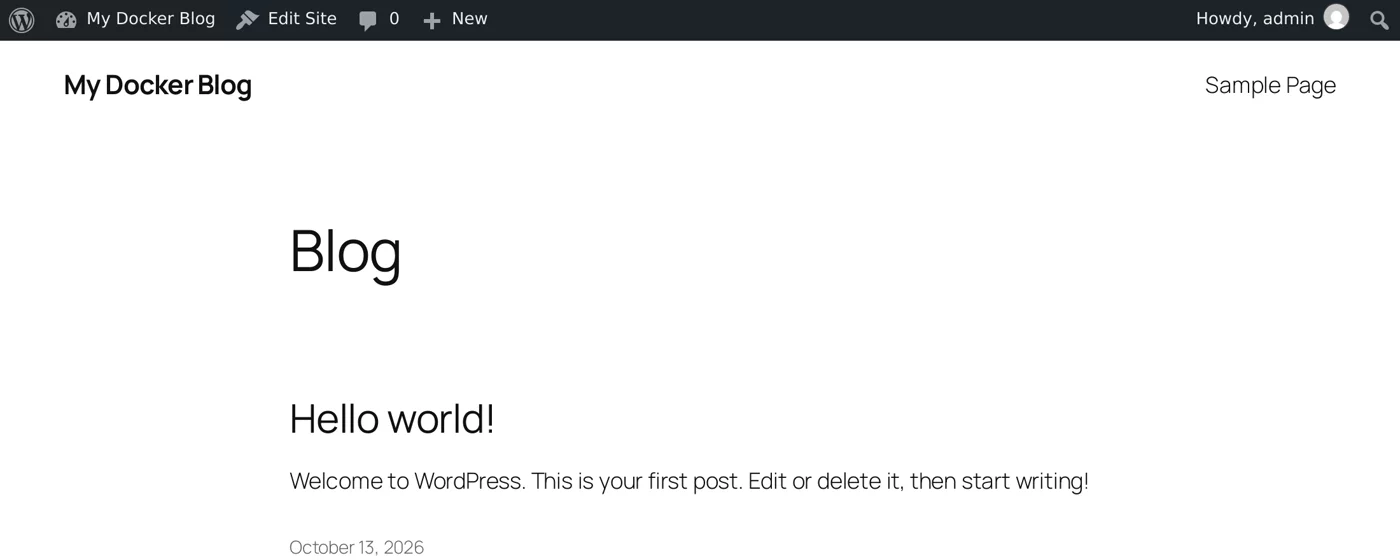
The site at http://localhost:8080 now shows the default Hello world! post:
Check the upload size limit
In the admin area, go to Media → Add Media File. The upload area shows the current limit below it. Maximum upload file size: 64 MB means uploads.ini is working:
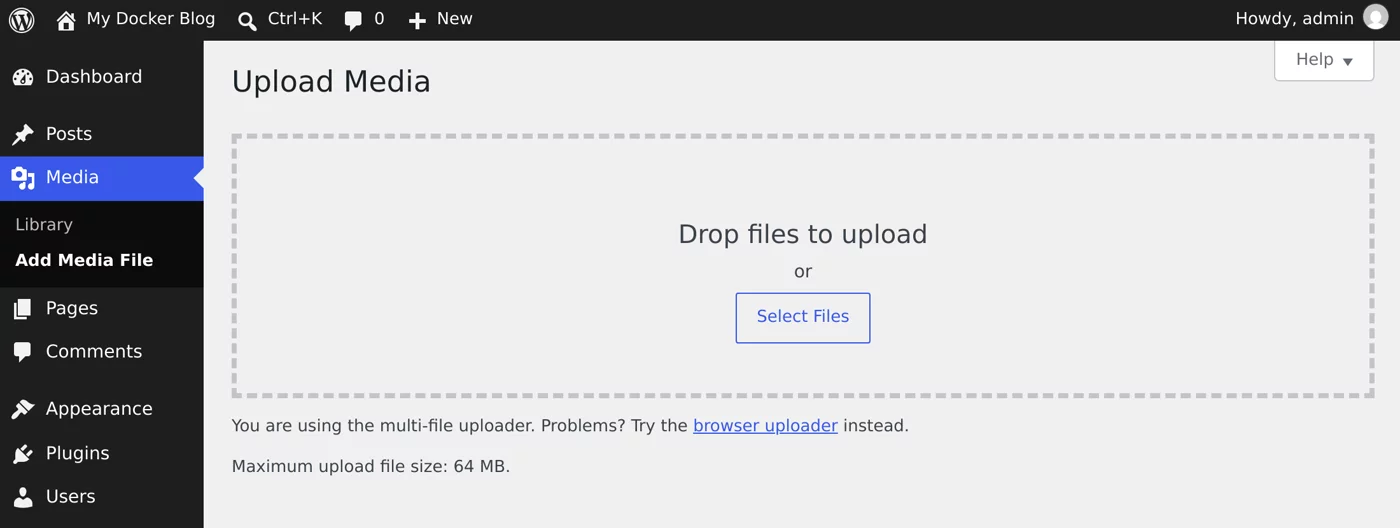
If the limit is still 2 MB, check that the mount path for uploads.ini is correct. After changing it, recreate the container with docker compose up -d; restart doesn't apply the new setting.
Manage the database with phpMyAdmin (optional)
phpMyAdmin is configured with profiles: [tools], so a regular docker compose up -d won't start it. Add --profile tools when you need it:
$ docker compose --profile tools up -d phpmyadmin
[+] up 25/25
 ✔ Image phpmyadmin                 Pulled                                                      6.3s
 ✔ Container wordpress-db-1         Running                                                     0.0s
 ✔ Container wordpress-phpmyadmin-1 Started                                                     0.6s
The command ends with phpmyadmin, so it starts only that service and its dependency, db (which is already running).
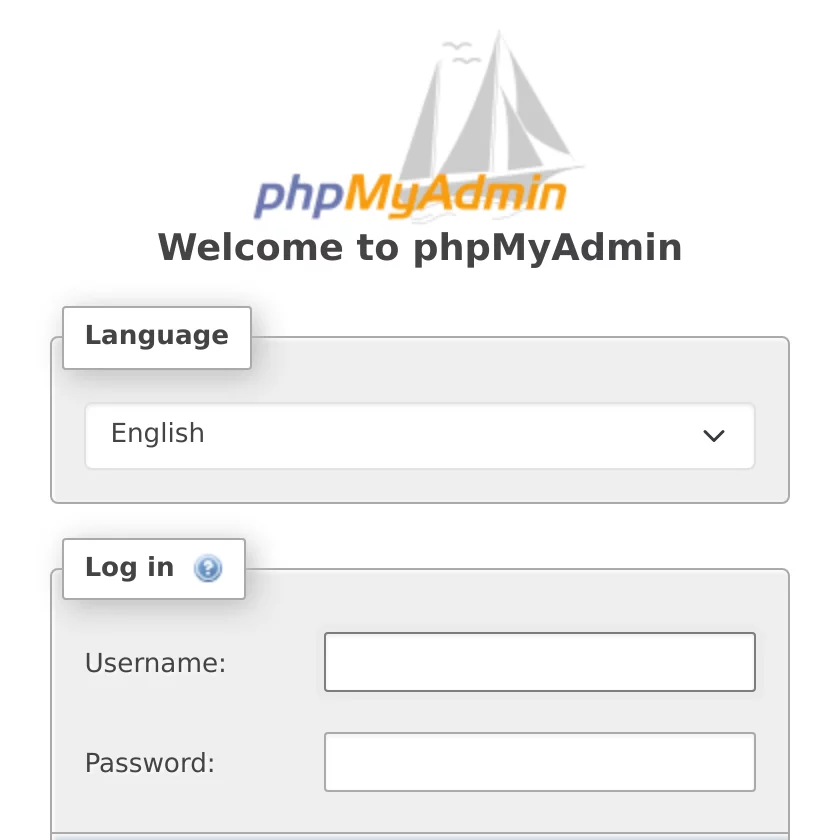
Open http://localhost:8081. Enter root as the username and the MYSQL_ROOT_PASSWORD from .env as the password:
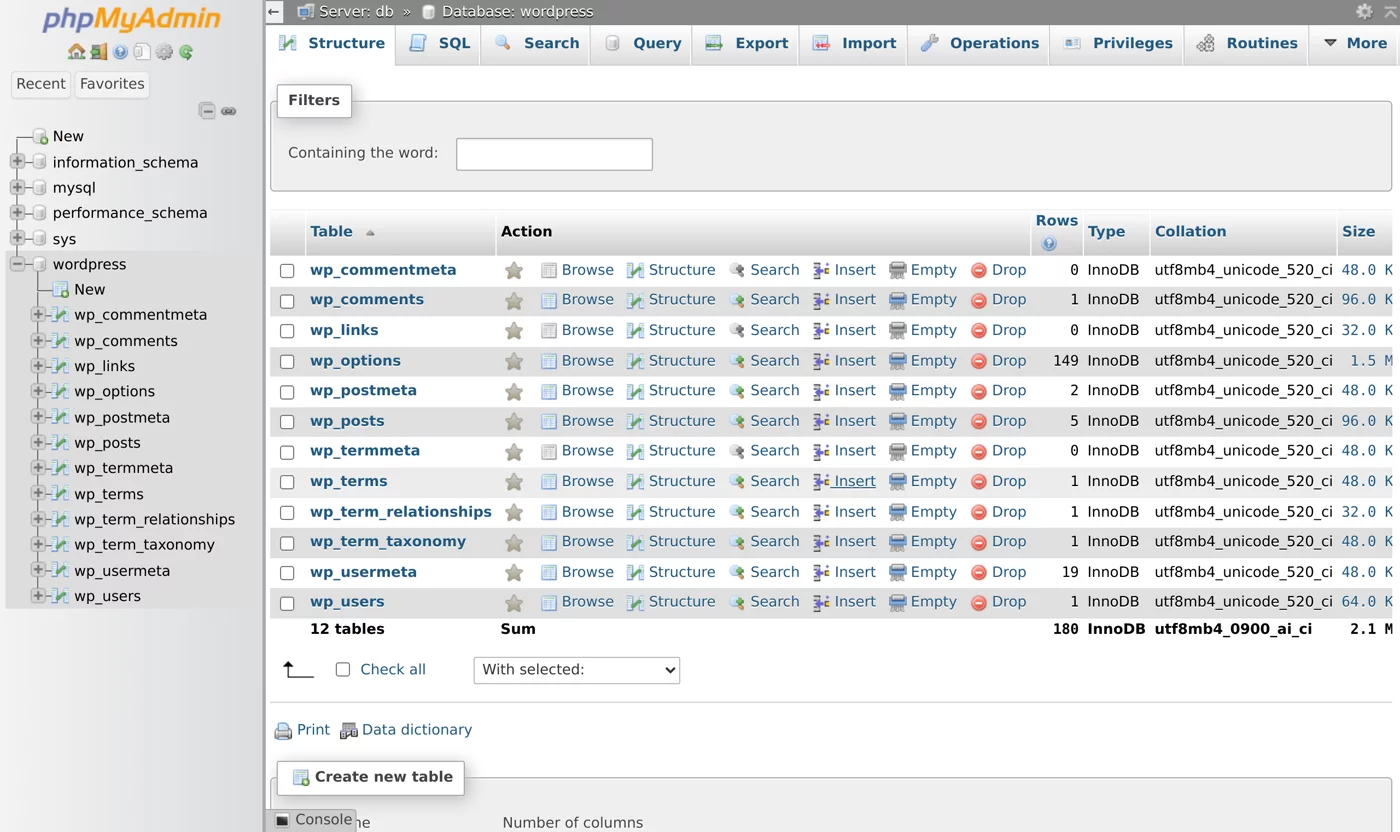
After you sign in, click the wordpress database on the left to see the 12 tables WordPress created (wp_posts, wp_options, wp_users…):
phpMyAdmin is bound to 127.0.0.1, so only this machine can connect. On a remote server, connect through an SSH tunnel (ssh -L 8081:127.0.0.1:8081 user@server); don't expose it to the public internet. When you're done, you can stop just phpMyAdmin:
docker compose --profile tools stop phpmyadminWhere the data is stored
| Volume | Contents |
|---|---|
wordpress_db_data | MySQL database: posts, pages, settings, users, and comments |
wordpress_wp_data | WordPress files, themes, plugins, and uploaded media (wp-content/uploads) |
Back up both Volumes. You need both to restore the complete site.
Back up
Run these commands from the project directory. First, export the database with mysqldump. Then use a temporary alpine container to package the wp_data Volume as a tar.gz file:
$ docker compose exec -T db sh -c 'mysqldump -uroot -p"$MYSQL_ROOT_PASSWORD" wordpress' > wordpress.sql
mysqldump: [Warning] Using a password on the command line interface can be insecure.

$ ls -lh wordpress.sql && head -n 5 wordpress.sql
-rw-r--r--    1 root     root      880.8K Oct 13 00:22 wordpress.sql
-- MySQL dump 10.13  Distrib 8.4.11, for Linux (x86_64)
--
-- Host: localhost    Database: wordpress
-- ------------------------------------------------------
-- Server version	8.4.11

$ docker run --rm -v "$(basename "$PWD")_wp_data:/data:ro" -v "$PWD:/backup" alpine:3.23 tar czf /backup/wp_data.tar.gz -C /data .

$ ls -lh wp_data.tar.gz
-rw-r--r--    1 root     root       33.9M Oct 13 00:22 wp_data.tar.gz
Here's what the commands do:
exec -T: Disables the TTY so the output can be redirected to a file with>.sh -c '... -p"$MYSQL_ROOT_PASSWORD"': Single quotes let the variable expand inside the container (the MySQL container has this environment variable), so the host doesn't need to know the password.[Warning] Using a password on the command line interface can be insecure.is a MySQL warning written to stderr. It isn't included inwordpress.sqland can be ignored.- The start of
wordpress.sqlshowsMySQL dump … Distrib 8.4.11, which means the export succeeded. $(basename "$PWD")_wp_databuilds the Volume namewordpress_wp_data. If your directory has a different name, check withdocker volume ls.:romeans read-only; the backup process won't change the data.
Copy wordpress.sql and wp_data.tar.gz to another machine or cloud storage for a real backup.
Back up on Windows
PowerShell doesn't support <, and > in Windows PowerShell 5.1 saves SQL files as UTF-16. Instead, create the file inside the container and copy it out with docker compose cp. When packaging wp_data, enter the Volume name directly (by default, folder-name_wp_data):
docker compose exec db sh -c 'mysqldump -uroot -p$MYSQL_ROOT_PASSWORD --result-file=/tmp/wordpress.sql wordpress'
docker compose cp db:/tmp/wordpress.sql wordpress.sql
docker run --rm -v wordpress_wp_data:/data:ro -v "$(pwd):/backup" alpine:3.23 tar czf /backup/wp_data.tar.gz -C /data .
docker compose exec db sh -c 'mysqldump -uroot -p$MYSQL_ROOT_PASSWORD --result-file=/tmp/wordpress.sql wordpress'
docker compose cp db:/tmp/wordpress.sql wordpress.sql
docker run --rm -v wordpress_wp_data:/data:ro -v "${PWD}:/backup" alpine:3.23 tar czf /backup/wp_data.tar.gz -C /data .docker compose exec db sh -c "mysqldump -uroot -p$MYSQL_ROOT_PASSWORD --result-file=/tmp/wordpress.sql wordpress"
docker compose cp db:/tmp/wordpress.sql wordpress.sql
docker run --rm -v wordpress_wp_data:/data:ro -v "%cd%:/backup" alpine:3.23 tar czf /backup/wp_data.tar.gz -C /data .To restore, do the reverse: run docker compose cp wordpress.sql db:/tmp/restore.sql, then docker compose exec db sh -c 'mysql -uroot -p$MYSQL_ROOT_PASSWORD wordpress < /tmp/restore.sql'. Both packaging and extracting the tar file happen inside the alpine container, so Windows doesn't affect them.
Restore
On a new machine (or after clearing the existing setup), put compose.yaml, .env, uploads.ini, and the two backup files in place. Then:
# 1. Start only the database and wait for it to become healthy
docker compose up -d --wait db

# 2. Import the database
docker compose exec -T db sh -c 'mysql -uroot -p"$MYSQL_ROOT_PASSWORD" wordpress' < wordpress.sql

# 3. Restore WordPress files to the Volume
docker run --rm \
  -v "$(basename "$PWD")_wp_data:/data" \
  -v "$PWD:/backup" \
  alpine:3.23 sh -c "cd /data && tar xzf /backup/wp_data.tar.gz"

# 4. Start all services
docker compose up -d
--wait waits for the service to become healthy before returning, so you don't start the import before the database is ready. The password in .env must match the one used for the backup because wp-config.php (in wp_data) contains the old database password.
Update
You can update WordPress core, themes, and plugins in the admin area. Their files are stored in the wp_data Volume.
To update the images themselves (PHP, Apache, and MySQL patch versions):
$ docker compose pull
[+] pull 2/2
 ✔ Image wordpress:7-apache Pulled                                                              0.6s
 ✔ Image mysql:8.4          Pulled                                                              0.7s

$ docker compose up -d
[+] up 2/2
 ✔ Container wordpress-wordpress-1 Running                                                      0.0s
 ✔ Container wordpress-db-1        Healthy                                                      0.5s
pull downloads updated images; up -d recreates only containers whose images have changed. In this example, the images have no new versions, so the containers remain Running.
Keep these points in mind:
- Back up before updating.
wordpress:7-apachefollows 7.x updates. To pin a version, specify the full version number, such aswordpress:7.1.3-apache.- If
wp_dataalready contains WordPress files, the image won't overwrite them, so use the admin area to update the WordPress core. - Before upgrading MySQL across major versions (for example, 8.0 → 8.4), read the official MySQL upgrade guide. Don't just change the tag.
Remove the entire setup
To clean up after practicing, include --profile tools to remove phpMyAdmin too. -v removes the Volumes, and all site data will be lost:
$ docker compose --profile tools down -v
[+] down 6/6
 ✔ Container wordpress-wordpress-1  Removed                                                     1.5s
 ✔ Container wordpress-phpmyadmin-1 Removed                                                     1.5s
 ✔ Container wordpress-db-1         Removed                                                     2.3s
 ✔ Volume wordpress_wp_data         Removed                                                     0.3s
 ✔ Network wordpress_default        Removed                                                     0.2s
 ✔ Volume wordpress_db_data         Removed                                                     0.3s
Production checklist
- Put a reverse proxy in front to handle HTTPS, such as Nginx, Caddy, or Traefik. See Nginx static sites and reverse proxy.
- Don't expose the database with
ports, and don't expose phpMyAdmin to the public internet. - Don't use
adminfor the administrator account, and choose a strong password. - Schedule regular backups (for example, run the backup commands above with cron) and store them on another machine.
- Don't commit
.envto Git.
Recap
- Manage WordPress and MySQL with Compose, and store their data in the
db_dataandwp_dataVolumes. - Use
-h 127.0.0.1for the MySQL health check to avoid marking it healthy during initialization. - Put phpMyAdmin in a profile and bind it to 127.0.0.1 only.
- Back up both the database and website files, and store the backups on another machine.
Exercises
Exercise 1: Use one command to confirm that PHP's upload limit is 64M.
Answer
docker compose exec wordpress php -r "echo ini_get('upload_max_filesize');"The output is 64M.
Exercise 2: You're moving the site to another host. Which files do you need to take with you?
Answer
compose.yaml, .env, uploads.ini, and the two backups: wordpress.sql (database) and wp_data.tar.gz (website files). Follow this chapter's Restore steps on the new host.
FAQ
Why doesn't the installation screen ask for database settings?
The WORDPRESS_DB_* environment variables provide the connection details, and the image automatically generates wp-config.php when it starts.
Why do I see an upload size limit error?
The WordPress image defaults to a PHP upload limit of 2 MB. Adjust it with this chapter's uploads.ini, then recreate the container with docker compose up -d.
How do I back up on Windows?
PowerShell doesn't support <, and > in Windows PowerShell 5.1 changes the file encoding. The Backup section in this chapter shows how to export from inside the container and then copy the file out with docker cp.
Updated October 14, 2026